Hi

Hi, Thanks for dropping by.

My name is Eileen but to friends in the card making world I'm known as 'ikki'. (which is pronounced I-KEY) From where or how this came about I'm not sure - it just got shorten from my original craft name of Ikemo by various friends along my crafting way! I started crafting whilst recouperating from an accident, and from my first attempts with peeloffs and paint - I was hooked! Now my passion is my BUG! and now BEADING!

In the Cupboard you will find ideas, news, tips and techniques to help you get more from this fab little machine. So come in - join the fun and Cuttle with me!


Wednesday 30 June 2010

Hi WOYWWer's - Hope you are all well and enjoying this summer weather.  Crafting for me is out of the question at the moment - my hols approach quickly now - like tomorrow!  Since my daughter and children will be using our home as their holiday base my craftroom has had to be sorted and so my desk looks like this......

all the bits and pieces gone, good job my little desk has the advantage of a lid!

If you are a regular visitor to the Cupboard, I have left a number of posts for you whilst I'm away, (my fingers are crossed that the schedule thingy works!!).

For anyone visiting that may be wondering what WOYWW is all about - it stands for What's on your Workdesk Wednesday.  If you would like to join our fun and interesting group there is a link on my sidebar - pop over and say hello to our leader Julia.  This is the place where things happen on a Wednesday!

Monday 28 June 2010

Cuttlebug Cupboard - Spellbinder Mega Rectangles

Today's tutorial is based on the Spellbinder's Mega Rectangles,  I actually did this way back in January, and somehow forgot to post it!  But, better later than never.
As with all the label dies, the difference between the sizes means that layering is more difficult.  If you like wide borders, you are okay - but what if you like to have narrow borders?  My friend, Andrea explained this to me, but it was only by playing that I cottoned on.   Cool Andrea! This is how you do it.

With the same die, cut 2 shapes  The die-cut with the image is then embossed.  You can use the TAN mat or an embossing tool to run round the edge whilst the die-cut in still in the die.   Following the line of the embossing, cut off the embossing.

and when fixed together.....you have a narrow border!  An alternative way would be to cut and emboss round the image as usual, then draw round the die and cut with scissors.  I have tried both ways and found that by cutting the edge off of the inner shape it was less noticeable if the cut was not exact! 

The next part of my card was to cut another die-cut - this time I used a border from the Joy Crafts range. These dies are smaller than the Spellbinders, but have their uses in your craft box.  Having cut the die, I inked and dusted with Metallic Perfect Pearls which is perfect for a grunge look!
Next some simple matting and layering, which I actually find not so simple to get square!

and my finished card......


The image is a digital download from Sketching Stamper which I love!  It's big and bold and beautiful!!
Hope you like this idea and will find a use for it in your crafting.  Thanks Andrea for your help.

Friday 25 June 2010

Friday Followers Gallery

Today in my FFG I'm doing something different - 2 cards.  Both cards were made by Ann and illustrate how the same idea can look totally different by changing the colours.


You can read Ann's post here

change the colour - change the look!

  
A different take on the same idea and well worth a read.

Ann your cards are great, and something I have never seen done before and I'm sure others won't have either.  Thanks for allowing me to put your work in my FFG. 

If you have card that you think is different and would like to share with us, pleased get in touch with me. 

Thursday 24 June 2010

Tippy Thursday - Ribbon

I have been asked how I made this kind of tassel for my tag...

It's a bit different and it's very easy......


Take a length of satin ribbon and cut off the binding edge on both sides, this will allow you to shred the warp threads from the weft.  Now you repeat the process on the other end and hey presto.....


         a fancy ribbon for the tag I made and didn't know what to do with it....actually I still don't, but at least the tag is finished now!

Wednesday 23 June 2010

WOYWW

Hi all, hope you are all well and enjoying this week of summer!  I have been missing for the last two weeks due to life's chores getting in the way of my crafting, but I'm back with a shot of my desk.....

This is how I left my desk last night.  I have just taken this photo and when I saw it I had to smile because they say a photo never lies AND this  doesn't because what's there echos the state of my mind!  I had a good day yesterday - shopping and buying clothes and ordering some new crafting goodies. Then I went bowling and on an away green won my match easily by playing well.  Home, got dinner, out again to watch another bowls match on a lovely evening with the added bonus of a lager for I had to replenish my fluids!  Home and a go at crafting whilst Dave watched some MORE footie.  I felt happy!   I made the two tags and then indecision set in.....what colour card.....what embossing.....what...what....what.  I packed up!  Not unhappy, but frustrated.  As I said before the photo say it all. 

Hope you all have a good WOYWW day, I hoping that visiting you talented crafters will inspire me with what to do with these tags.  So beware, I'm picking brains today....wonder what you've got to show me???!?!????

Monday 21 June 2010

Spellbinders - Nestabilities - Labels One

My tutorial today is very different to my usual simple less is more style of card, and I hope you will like it.....

Materials used:
6 x 6 card
Nestie label 1
DP - Basic Grey
Various stamps and inks
Ribbon, wire, beads

I never realised I had a favourite crafting colour until I looked back on my recent cards and saw that Green in some shade or other was there!  Today is no exception.....
I have always loved papers from Basic Grey, this is from the Scrapbook Designer papers - just a green with blobs of peachy orange and black  lines.....perfect for stamping on!  The flower stamp is from Hero Arts called Flourish Bloom and the Dragonfly is by Stampendous and together with a Label One die and a few more dabs of distress inks, make a surprise when opening the card.

Using the same DP for the front of my card, I stamped the dragonfly and a border of swirls with Adirondack Raison and again added a bit more colour to the edges.   

Now I needed an embellishment...
I tried something new for me - a resist technique.  I first stamped the flower with a white acrylic dabber (the border is the same stamp).  When dry I completely covered the tag with various colours of DI's then rubbed  the ink off to show the pattern.  All I needed then was a touch of the raison colour by way of the dragonfly and a sentiment, a light misting of water and a few splodges of glitter glue (which you canot see - drat!) to finish  my tag.

I made a tassel from satin ribbon

a curl of wire and beads and.....
my card was finished. 

I enjoyed trying the resist technique and stamping on decorative paper.  It's taken me a long time to pluck up the courage to change some of my crafting habits, but now I've started, doubt I'll stop!


Saturday 19 June 2010

Spellbinders Impressabilities - and finally

Hi, hope you are still with me and have enjoyed looking at my adventures with the Impressabilitie die.

Today I want to show you these......
embellishments made by embossing and debossing the stencil into card coloured with distress inks and coated with embossing powder. 
 
This was embossed, then inked, then embossed with 2 coats of clear embossing powder.


These were coloured with distress inks, then triple embossed, THEN debossed into the triple embossing. 

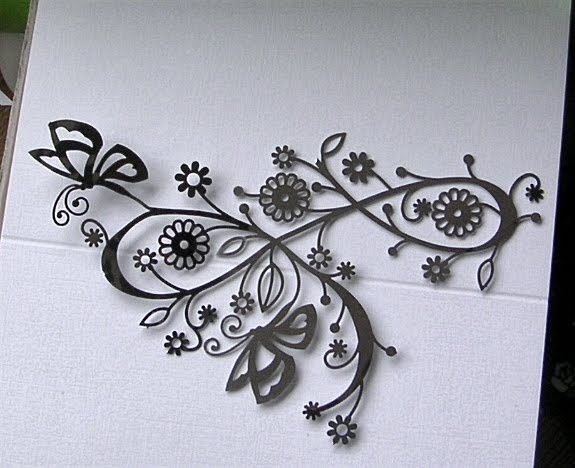
The effects to me are stunning, but I admit to being a bit of a nut case when it comes to distress inks, triple embossing and the Bug!  You can start off with something like this...

a piece of scrap card coloured with ink and spray with water, and  finished up with

this! 
  There's always that element of excitement every time because every piece is different and until the colours come to life with the embossing powder you never know what you will end up with! 

The embellishments are like glazed tiles, and difficult to photo to show them off

but here's a tag mounted onto an embossed card I showed you in an earlier post 

To summarise:  My thoughts on the Impressabilities dies have changed, I can now see that they are a useful piece of equipment to have in the Cupboard. 

If you have a Wizard or Big Shot, you'll not have had the problems that I've encountered, but the Bug is not as sturdy and adjustments are needed to get a good impression of a heavier weight card.    It seems from the comments I've received that various sandwiches work.  You need to try different ones until you get the clarity of embossing you are looking for as all machines are different.  Again the Golden Rule - never force or you'll break!

Impressabilites can be used for embossing and debossing die cuts for matting and layering. You can use techniques like letterpressing  or stenciling to colour them. You can use them in the whole.  Or like me - cut them up so you can embossed different  patterns straight onto your card base or make your own unique embellishments.  The only problem I've now got is.....where did I put that little butterfly?

Thanks for dropping by, hope you have found the week interesting and useful.

Friday 18 June 2010

Impressabilities - Episode 4

Before I reveal my latest success with the Impressabilitie die, I thought I should show you this card made by my Cuttlebug mate Chrissie.

Chrissie has used to great effect a method of embossing call Letterpressing where you ink the stencil and then emboss it. 
Pop over to Chrissie's and view the work of a very talented crafter and since it's Friday and Followers Gallery time, I'm real pleased to put this card in my gallery.  Thanks Chrissie. 

If you would like to see more of this technique check out this link:  http://stamptv.ning.com/video/letterpress-with

TIP:   Dye (Momento/Adirondack) inks are waterbased and easier to clean from the stencil. It also dries straight away on your card, with pigment ink you will need to wait for it to dry on your image before you can use it. 

Final episode tomorrow......think you have all be patient enough!

Thursday 17 June 2010

Impressabilities - Episode 3

Hi back again with the next installment......hope you are still with me!

Now I can deboss (or emboss if you wish by having the front of your card facing down in the sandwich) the stencil has become much more versatile - okay, only through my accident of mangling up the frame but nevertheless more versatile.  You can move your stencil around to suit your card - here are two layouts. 

Using 1 stencil

Using 2 stencils


You will notice that I have placed the stencil over the centre fold, but even embossing this way works - it looks as if it was meant to be there enhancing the back of the card!

and another possible design

Add a flower spray and you have a card for any occasion.

I'm not sure that if I'd not had my mishap with the frame that I would have had the nerve to get the scissors out to this pretty metal stencil, but then accidents do happen and sometimes they turn out for the better.  I feel that the embossing is nicer like this than in the whole, somehow it seems more noticeable - a case of less is more and there is the added bonus of lots of different designs!   You will also have a decorative pattern on the inside on your card.  However, I have to admit that now I have 4 bits instead of 1, I cannot use the the impressabilitie die to stencil.  Wonder if I can stick it together?!?!?!  I've not finished with this tale yet for tomorrow in my Friday Followers Gallery I'll show you something that one of my blog mates has done with impressabilities!?!?!?

Tuesday 15 June 2010

Impressabilities - Episode 2

Hi, thanks for dropping by to see if I'd solved the problem I told you about yesterday over the difficulties I 'd had with my one and only impressabilitie embossing die.  Enough for me to bin the it, but I don't like to be beaten so I preservered!

Since I couldn't get a good impression, I began to look at the sandwich I was using.   Yes, I was using the tan mat in the way that you do for brass stencils (you will find a link here of a tutorial I did last year) but that wasn't working in my Bug with this stencil.  Then I thought hey, perhaps it's the same as with some of the less sturdy dies, like Nellie Snellen and Joy Crafts, where reversing the order of the sandwich gives a better cut.  So, with fingers crossed and using the smallest of the dies that I'd cut from the whole plate, I made this sandwich......
B  /  B /  Shim / Tan Mat / card right side up / Die 

then topped the lot with the A plate.  A complete reverse of the usual sandwich.

Eureka - it worked!

Boy, was I excited, to get this far!!

and this is how my very simple butterfly die looked when embossed three times to enhance the background   to my decoupage embellishment


        This is the debossed pattern - I like this better than the embossed because it is more delicate.

One of the problems I had created for myself was that I like to emboss/deboss straight onto my card base.  I also like to use a heavyweight cardstock, with a lighter weight it is possible to do the task and get an impression, but for me, I still want to use the heavier weight. If you only want to make a decorative mat or frame, the lighter weight card works.   This card was a 240 grm.

If you have a Wizard or Big Shot you will not be having the same problems as me!  The Bug is not as sturdy and the pressure the rollers exert on the card is not as great.  Also all machines seem to differ, so what works for me may not necessarily work for you.  The above sandwich has caused me no problems despite being unconventional., and I have heard that others recipes also work, so it seems that the order of the sandwich is choice, but the right thickness is priority.  The Golden Rule being - NEVER FORCE. 

Of course, I wanted to go on with my experiments and I did and found that my new sandwich recipe helped, but if you're interested in how things turned out??????afraid you'll have to come back tomorrow.

to be continued..... 

Spellbinders - Impressabilities

This is a story which I'm going to tell you in episodes since it's happened over a period of a year....so I hope you will join me as the story unfolds.

Impressabilities I have not been very impressed with!  From the first I've had problems with this form of embossing.  I received my parcel containing the Butterfly stencil and, as you do, couldn't wait to get started.
The first thing I did was to warp the frame, not a good start!  Next, no matter what card I used I couldn't get a good impression using the Bug. I tried my usual thick card - no luck; I tried thiner card - better but not impressed; I tried misting my card - no luck.  I was told that other machines do the job much better, but this was not much consolation to me in my frustrated mood!  I could emboss pearlised card quite well, but I don't use this type of card very often; I could emboss decorative paper or mulberry paper , but again for me a limited use.  Disappointment!  I put the thing in the cupboard on a back shelf.

Weeks later I tried again, but this time because of the mangled frame I'd decided to cut my stencil  into bits.

Aren't they pretty?   But, I still couldn't use them!

BUT I WILL!!!!

to be continued tomorrow......drop by and see if I have!?!??!


Monday 14 June 2010

Embossing with the Bug

Yesterday was  a very grey wet day - quite depressing,  but then it was the l3th June - what did I expect!

To cheer myself up, and bright happy card was called for .....

I think I've said before that I like playing (or messy around) with inks.  This is just a scrap of card which I coloured with three inks over a plastic stencil.  I was pleased with the result, but at the time didn't know what to do with it!

Today I did....and by adding a flower with a stamped centre, a wire twirl and another flower.....a ribbon and
an embossed card using the Daisy folder from Crafts too you.....
I'd cheered myself up!  That to me is what crafting is all about and I'm sure you will all agree.

Hope you'll be able to join me tomorrow - I have a tale to tell you about ?!??!?!?? 

Sunday 13 June 2010

Cuttlebug Script embossing folder

One of the things I like doing is to make my own embellishments, mainly because it gives me the opportunity to experiment and mess about!

I made this tag by embossing a piece of silver mirri card with the CB Script folder, then changed the colour with  alcohol inks.  The stamp is from Creative Expressions Birds which, of course, I triple embossed.  Only a wee postage stamp, but just enough to finish off my tag.   A case of less is more!

This is how I used the tag....

A simple, but effective card using alcohol inks to enhance and give life to the embossing.